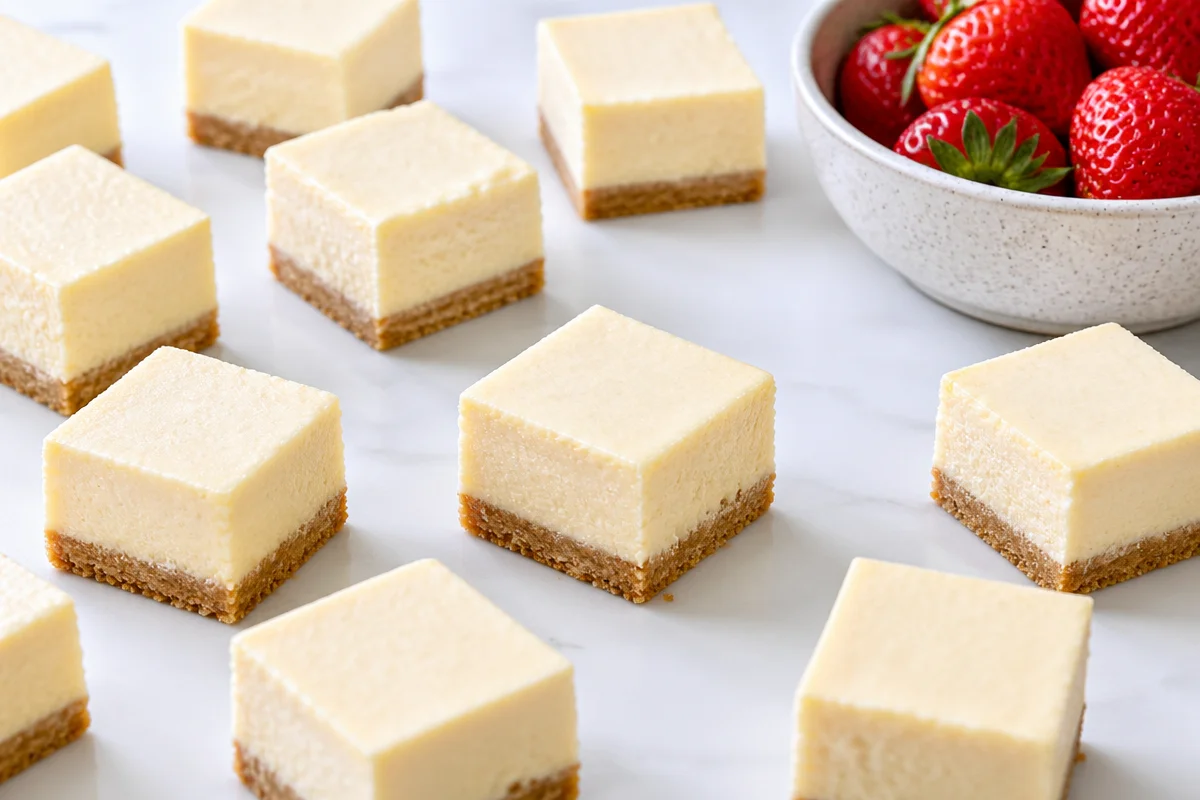
Easy Cheesecake Bars are my go to move when I want a real dessert moment but I do not want to fuss with a springform pan, water baths, or fancy decorating. You know those days when you promise yourself you will bake something fun, and then you remember you also have laundry and a million tabs open on your phone. Yep, this is for that day. These bars bake up creamy, slice cleanly, and feel like a treat you would buy at a bakery. I have made them for potlucks, lazy weekends, and one time just because my fridge had cream cheese that needed a purpose. Let me walk you through it like we are hanging out in the kitchen together.
Table of Contents
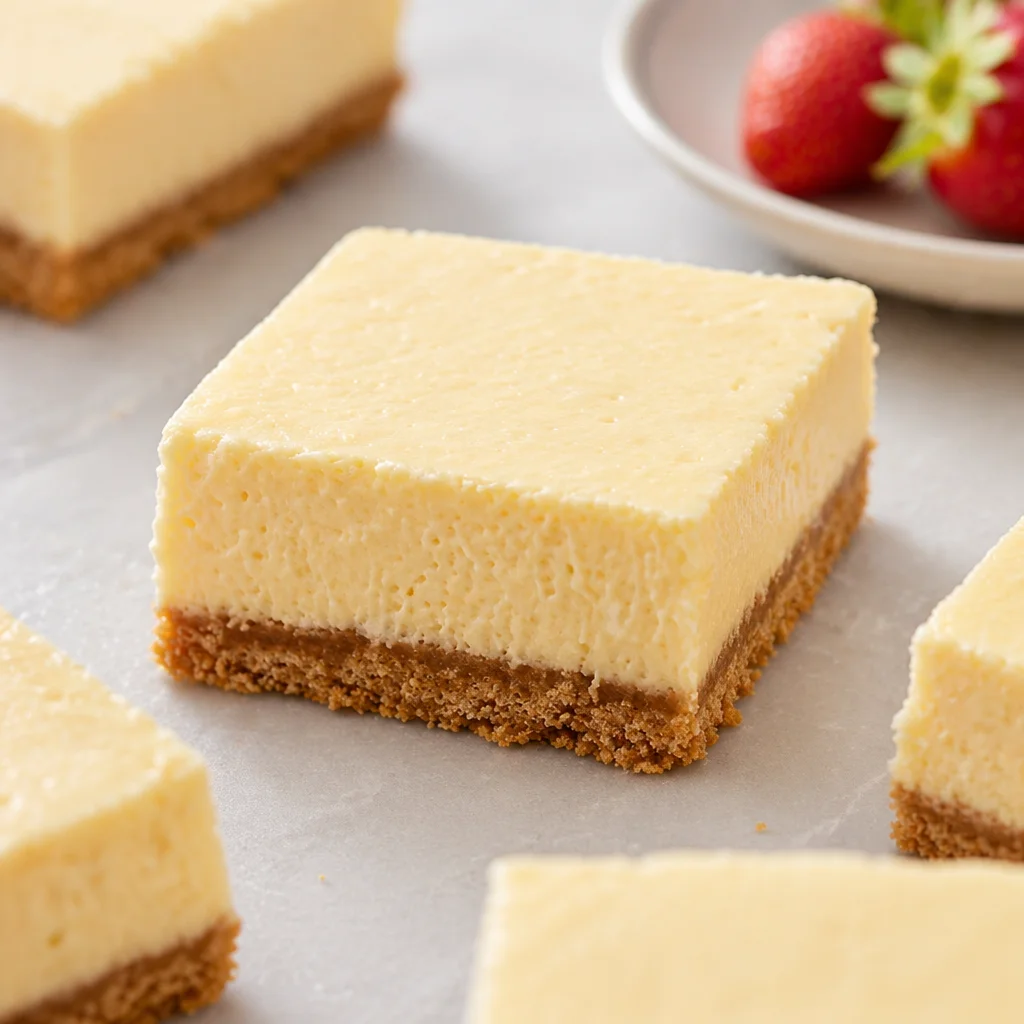
How To Make Cheesecake Bars
This is the part where you realize cheesecake does not have to be intimidating. The biggest secret is simple: room temperature cream cheese and a little patience while they chill. I like these bars because the steps are straightforward and the results feel impressive.
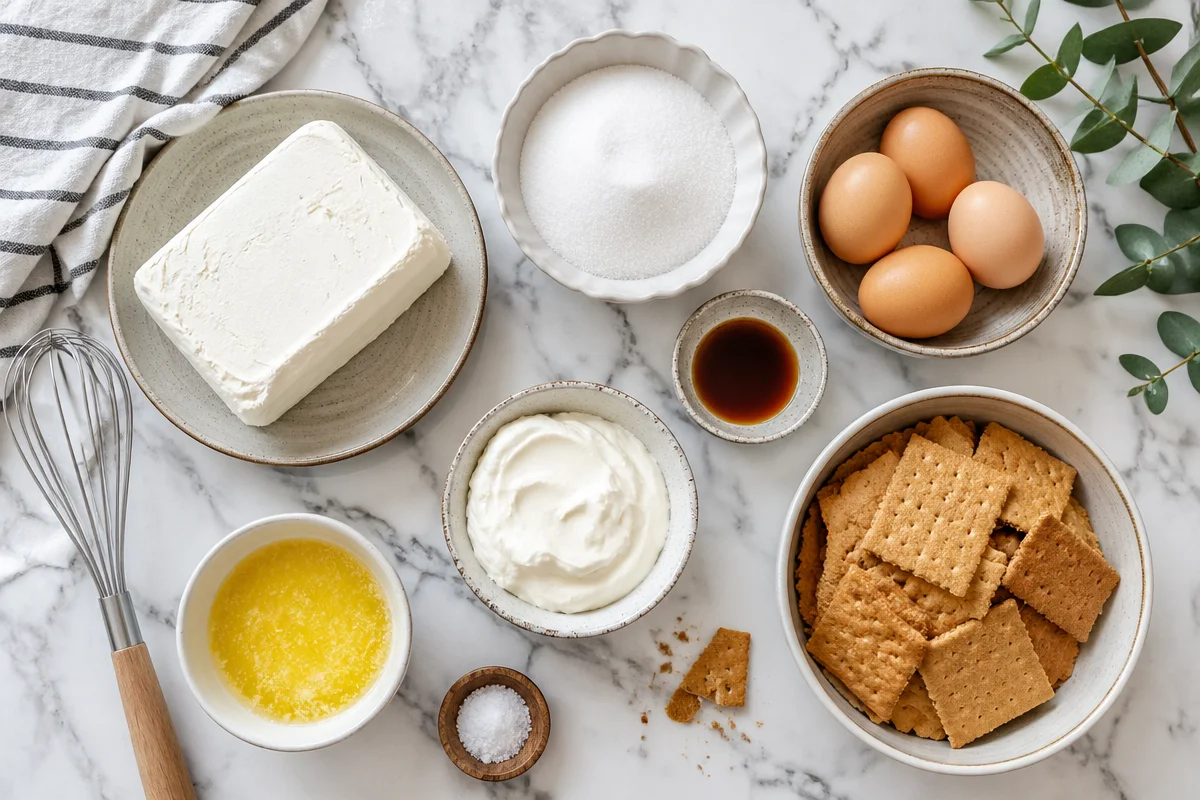
What you will need
- Cream cheese, softened (full fat gives the best texture)
- Sugar
- Eggs
- Vanilla extract
- Sour cream or Greek yogurt (for that smooth, slightly tangy bite)
- Graham crackers (or cookie crumbs) and melted butter for the crust
- Pinch of salt
Here is how I do it, in my regular home kitchen style.
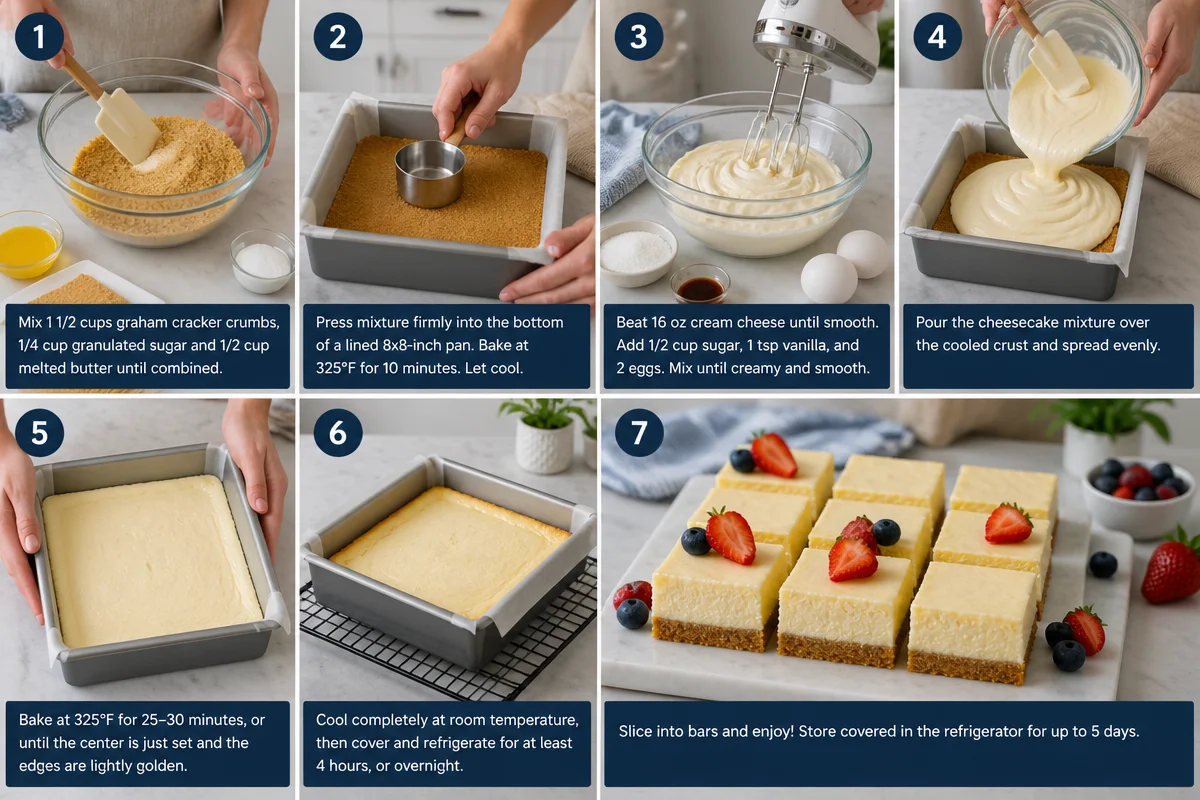
- Heat your oven to 325 F. Line an 8×8 pan with parchment so you can lift the bars out later.
- Mix graham cracker crumbs with melted butter and a spoonful of sugar. Press it into the pan firmly. I use the bottom of a measuring cup and really pack it in.
- Bake the crust for about 10 minutes, then let it cool a bit while you make the filling.
- Beat the softened cream cheese with sugar until smooth. Add eggs one at a time, then vanilla, sour cream, and salt. Mix just until it looks creamy and combined.
- Pour the filling over the crust. Tap the pan gently on the counter to pop bubbles.
- Bake until the edges are set and the middle still has a slight wobble, usually 35 to 45 minutes depending on your oven.
- Cool at room temp, then chill at least 4 hours. Overnight is even better for clean slices.
If you are into fun bar desserts like I am, you might also want to peek at these hot cocoa cheesecake bars. They are cozy and a little nostalgic, especially in colder months.
Variations And Toppings
Once you have the base recipe down, you can make Easy Cheesecake Bars feel brand new every time. I love that you can keep it simple for picky eaters, or go full dessert table energy with toppings.
My favorite easy variations:
Chocolate swirl: Melt a handful of chocolate chips with a splash of cream, drizzle it over the filling, and swirl with a knife.
Lemon: Add 1 to 2 tablespoons lemon juice plus some zest. It makes the whole pan taste brighter.
Cookie crust swap: Use crushed vanilla wafers, chocolate sandwich cookies (cream removed), or gingersnaps.
Berry topping: Warm berries with a little sugar and lemon until syrupy, then cool and spoon on top.
When I am short on time, I just top the chilled bars with a thin layer of whipped cream and whatever fruit is in the fridge. Even a spoonful of jam works. And if you want another fruity, creamy bar idea, these blueberry cream cheese danish bars are dangerously snackable.
I made these for a family get together and people kept going back for “just one more little piece.” The texture was perfect and they sliced so neatly after chilling.
Can I Make A Larger Batch?
Yes, and honestly it is a great idea if you are baking for a party or you want leftovers that last a few days. Easy Cheesecake Bars disappear fast in my house, so I often double the vibe.
Here is the easiest scaling approach:
For a 9×13 pan: Make about 1.5 times the recipe if you want slightly thicker bars, or double it for a tall, bakery style bar. Most people are happiest with 1.5 times. It keeps the bake time reasonable and still looks generous.
Baking notes when you scale up:
Use parchment with some overhang so you can lift the whole slab out for clean slicing.
The bake time will likely increase. Start checking around 45 minutes, then keep going in 5 minute increments until the edges look set and the center still jiggles a little.
Chilling is even more important with a big pan. Give it time so the middle firms up fully.
How To Make Ahead And Store
This is the part I really love. Easy Cheesecake Bars are almost better when you make them ahead, because chilling improves the texture and makes them slice like a dream.
Make ahead plan:
Bake them the night before, cool them, then chill overnight. Slice the next day and you look like you have your life together, even if you do not.
How to store:
In the fridge: Keep in an airtight container for up to 5 days. I like to place parchment between layers if I stack them.
In the freezer: Freeze slices on a tray until firm, then wrap individually and store in a freezer bag for up to 2 months. Thaw in the fridge overnight.
Travel tip: If you are bringing them somewhere, keep them chilled until the last minute. I have transported them in a cooler bag with an ice pack and it works great.
Pro Tips For Making This Recipe
I have made enough batches to learn what matters and what is not worth stressing over. These little tips will save you from the most common cheesecake bar issues.
Soften the cream cheese properly. If it is still cold, you will get lumps. I leave it out for about an hour, or I cut it into cubes to speed things up.
Do not overmix after adding eggs. Mix just until combined. Overmixing can add too much air, which can lead to cracks and a puffy top.
Line the pan. Parchment makes removal and slicing so much easier. This is one of those small steps that pays off big.
Cool slowly. Let the bars cool at room temp first, then refrigerate. Big temperature swings can cause cracking.
Use a hot knife for clean slices. Run your knife under hot water, wipe it dry, and slice. Repeat between cuts if you want super neat edges.
Also, if you are a dessert bar person in general, keep a list of your favorites. I do that because once you get into bars, it is hard to stop.
Common Questions
1) How do I know when the cheesecake bars are done?
The edges should look set, and the center should still have a slight jiggle. It will firm up as it cools and chills.
2) Why did my bars crack on top?
Usually it is from overmixing, baking a little too long, or cooling too fast. The good news is toppings hide everything.
3) Can I use low fat cream cheese?
You can, but the texture is usually less creamy and can be a bit more watery. Full fat gives the best results.
4) Do I really have to chill them before slicing?
Yes. If you slice too soon, the filling is soft and can get messy. Chilling is what makes them slice into tidy squares.
5) What is the best crust if I do not have graham crackers?
Any crisp cookie works. Vanilla wafers, digestive biscuits, or chocolate cookies are all great options.
A Sweet Little Wrap Up Before You Preheat
If you have been wanting a dessert that feels special but does not take over your whole day, Easy Cheesecake Bars are the answer. You get a buttery crust, a creamy center, and endless topping options without complicated steps. If you want to compare methods or get extra inspiration, I like looking at this Cheesecake Bars Recipe – Preppy Kitchen and this Cheesecake Bars – Sugar Spun Run because they both have helpful tips and clear baking cues. Now grab that cream cheese, let it soften, and give these a try this week. I think you are going to love how easy they are to bake and how fast they disappear.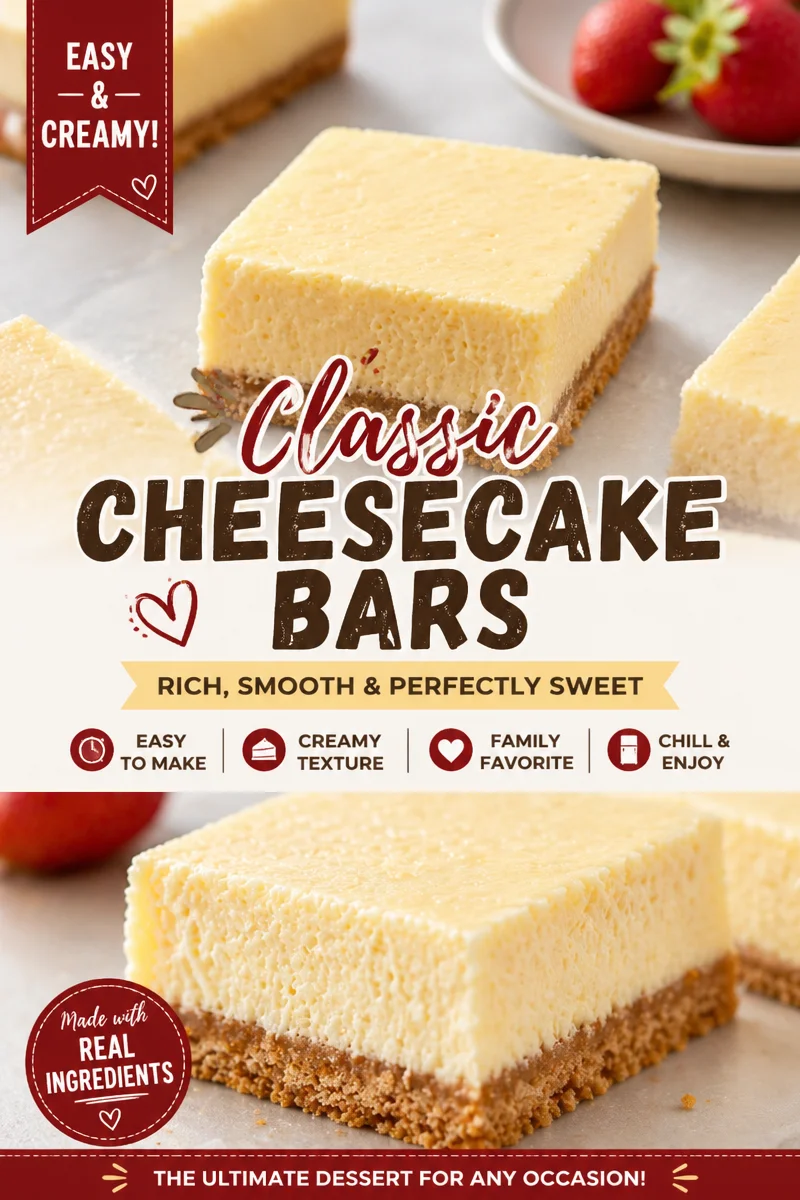
Easy Cheesecake Bars
Ingredients
Method
- Preheat your oven to 325°F (163°C). Line an 8×8 pan with parchment paper.
- In a bowl, mix crushed graham crackers with melted butter and a tablespoon of sugar. Press the mixture firmly into the prepared pan.
- Bake the crust for about 10 minutes, then let it cool for a few minutes.
- In a mixing bowl, beat the softened cream cheese with sugar until smooth.
- Add the eggs one at a time, mixing until fully incorporated. Then, add vanilla extract, sour cream (or yogurt), and a pinch of salt. Mix until creamy.
- Pour the filling over the cooled crust and tap the pan gently to remove air bubbles.
- Bake the bars for 35 to 45 minutes, until the edges are set and the center has a slight wobble.
- Allow to cool at room temperature, then refrigerate for at least 4 hours or overnight.