
Roasted Chocolate Cherry Brownies are what I bake when a regular pan of brownies sounds good, but I want something a little more memorable. The first time I roasted cherries for brownies, I loved how the heat transformed them. Instead of adding lots of watery fruit to the batter, I got soft, jammy cherries with a deeper sweet-tart flavor. Then I folded them into a dark chocolate brownie batter, and suddenly an everyday dessert tasted like something I’d order from a bakery.
These Roasted Chocolate Cherry Brownies have rich chocolate flavor, a dense fudgy middle, crackly tops, and little pockets of roasted fruit throughout. Better yet, you don’t need complicated equipment or pastry-school skills. Roast the cherries, mix the batter, bake, and give them enough time to cool before you start cutting.
- Why Roasted Chocolate Cherry Brownies Taste So Good
- Can I Roast The Cherries Ahead Of Time?
- How to Make Roasted Chocolate Cherry Brownies
- Cherry Substitutions and Expert Brownie Tips
- Serving and Storing Roasted Chocolate Cherry Brownies
- Common Questions
- Roasted Chocolate Cherry Brownies Worth the Extra Step
Why Roasted Chocolate Cherry Brownies Taste So Good
Chocolate and cherries already make a natural pair. Dark chocolate brings richness and slight bitterness, while cherries add sweetness and acidity. Therefore, neither flavor has to carry the dessert alone.
Roasting the cherries first makes that combination even better.
Why Roast Cherries Before Adding Them?
Fresh cherries contain plenty of juice. If you add too many directly to brownie batter, that liquid can create overly wet areas around the fruit.
Roasting changes them.
As the cherries heat, some moisture cooks away while their flavor becomes more concentrated. Their edges soften, their juices become syrupy, and the fruit develops a jammy texture.
That’s exactly what I want inside Roasted Chocolate Cherry Brownies.
Don’t roast them until they look dry or shriveled, though. You still want soft pieces of fruit.
I usually pit and halve the cherries, toss them with a small amount of sugar, and spread them across a parchment-lined baking sheet. Then I roast them until they soften and their juices begin to thicken.
Fresh cherries also work beautifully in chocolate brownies without roasting, although excess moisture can affect the finished texture. A current cherry brownie recipe I reviewed specifically recommends draining frozen cherries thoroughly to prevent soggy brownies.
If you’re firmly on team fudgy brownie, these brownies with almond flour offer another rich option. Meanwhile, zero sugar brownies take the chocolate craving in a different direction.
Ingredients for Fudgy Cherry Brownies
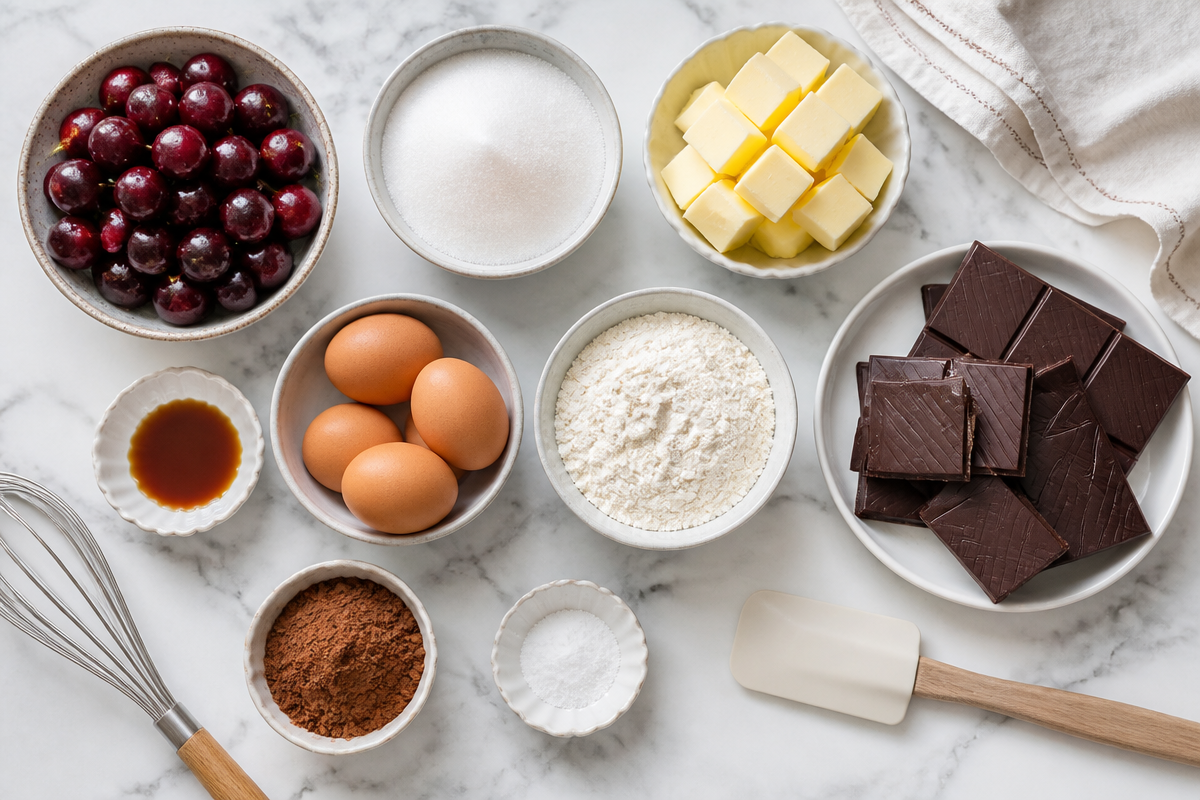
For the roasted cherries, you’ll need:
- 2 cups fresh pitted cherries, halved
- 1 tablespoon granulated sugar
For the brownie batter, gather:
- 1/2 cup unsalted butter
- 6 ounces dark or semisweet chocolate, chopped
- 3/4 cup granulated sugar
- 1/2 cup packed brown sugar
- 2 large eggs
- 1 large egg yolk
- 2 teaspoons vanilla extract
- 3/4 cup all-purpose flour
- 1/3 cup unsweetened cocoa powder
- 1/2 teaspoon fine salt
- Optional 1/2 cup dark or semisweet chocolate chips
- Optional flaky salt for the top
The extra egg yolk helps create a richer center without requiring much additional flour.
Meanwhile, brown sugar brings moisture and a subtle caramel note.
Chocolate plus cocoa gives the brownies a deeper chocolate character than cocoa alone. However, choose chocolate you actually enjoy eating because its flavor comes through clearly.
For another rich chocolate dessert, chocolate mousse gives you a lighter texture. If cherries are what brought you here, cherry snowball cookies make an easy addition to a dessert tray.
| Ingredient | Purpose | Helpful Tip |
|---|---|---|
| Roasted cherries | Sweet-tart fruit pockets | Keep them jammy, not dry |
| Dark chocolate | Rich chocolate base | Use chocolate you enjoy eating |
| Cocoa powder | Deeper cocoa flavor | Break up lumps before mixing |
| Eggs and yolk | Richness and structure | Whisk well with the sugars |
Can I Roast The Cherries Ahead Of Time?
Yes, and honestly it makes baking day feel way easier.
I roast cherries when I have a spare 20 minutes, then stash them for later. Roasting is simple: pit them, toss with a spoon or two of sugar, and bake until they look glossy and a little collapsed. Let them cool before using so they do not melt the batter into a weird warm puddle.
Here is how far ahead you can go:
- Roast up to 2 days ahead and keep them in the fridge in a sealed container.
- If there is a lot of juice, keep it with the cherries. That syrupy stuff is flavor.
- Bring them closer to room temp before mixing into the batter so everything bakes evenly.
One little tip from my own trial and error: do not roast them until they are totally dried out. You want jammy, not chewy. Those soft roasted cherries are the whole reason Roasted Chocolate Cherry Brownies taste so special.
How to Make Roasted Chocolate Cherry Brownies
I use an 8-by-8-inch metal baking pan for thick brownies. A 9-by-9-inch pan works too, although the thinner batter layer usually finishes baking sooner.
Line the pan with parchment and leave some overhang. You’ll appreciate those parchment handles when it’s time to remove the cooled brownies.
Roast the Cherries and Make the Batter
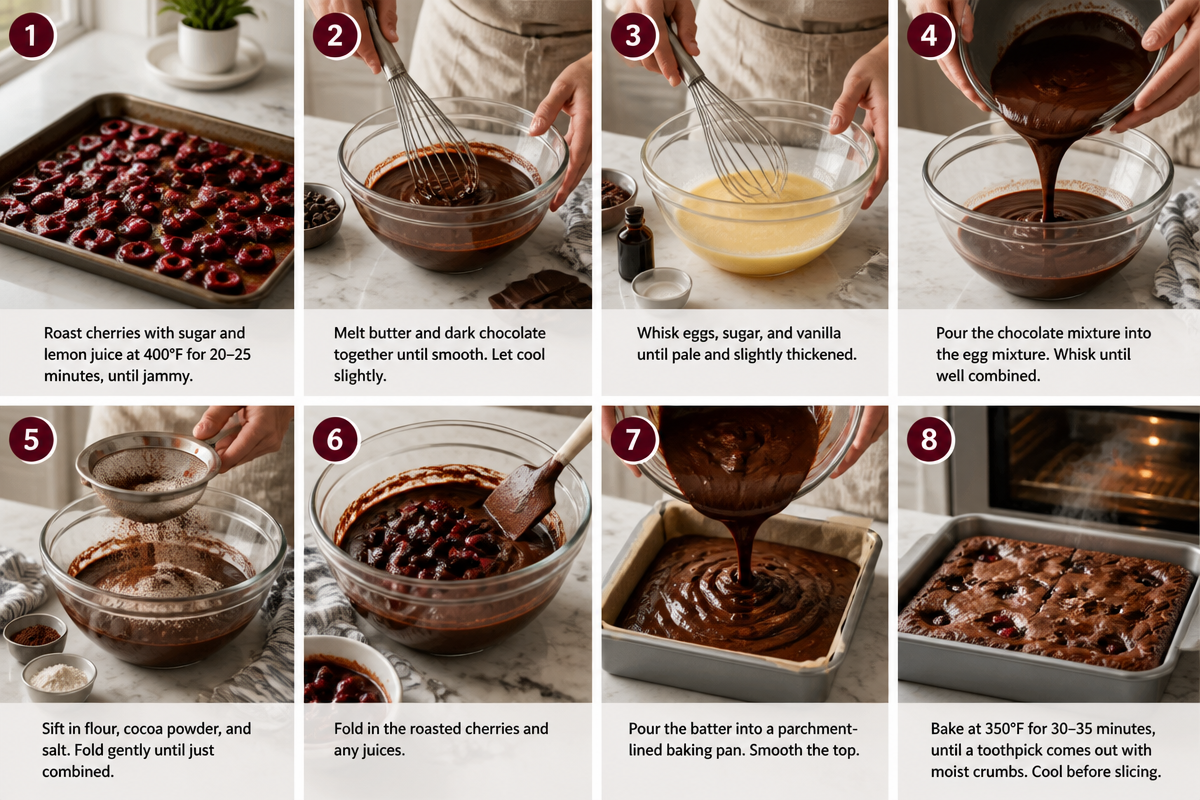
Step 1: Roast the cherries. Heat your oven to 400°F. Line a rimmed baking sheet with parchment.
Toss the pitted, halved cherries with 1 tablespoon sugar. Then spread them in one layer.
Roast for about 15 to 20 minutes, until the cherries soften and their juices look syrupy.
Remove them and let them cool.
Step 2: Prepare the brownie pan. Reduce the oven temperature to 350°F. Line an 8-by-8-inch metal baking pan with parchment.
Step 3: Melt the butter and chocolate. Place the butter and chopped chocolate in a heatproof bowl.
Microwave in short intervals, stirring frequently, until smooth. Alternatively, melt them gently over a double boiler.
Set the mixture aside for several minutes.
Step 4: Whisk the sugars and eggs. Add granulated sugar, brown sugar, eggs, and the egg yolk to a large bowl.
Whisk until the mixture looks smooth and slightly lighter. Then whisk in the vanilla.
Step 5: Add the chocolate. Slowly whisk the warm chocolate-butter mixture into the eggs.
Don’t pour extremely hot chocolate directly into the eggs.
Step 6: Add the dry ingredients. Add flour, cocoa powder, and salt.
Fold with a spatula just until you stop seeing dry streaks.
Overmixing at this stage can move the texture away from the dense brownie we’re after.
Step 7: Add the roasted cherries. Reserve a few cherries for the top. Then gently fold the rest into the batter with optional chocolate chips.
Step 8: Fill the pan. Spread the brownie batter evenly in the prepared pan.
Scatter the reserved roasted cherries over the surface and press them lightly into the batter.
Add a small pinch of flaky salt if you enjoy sweet-salty desserts.
Step 9: Bake. Bake for approximately 28 to 35 minutes.
Start checking early because ovens and pans vary.
Step 10: Cool completely. Place the pan on a cooling rack and leave the brownies alone until fully cool.
For particularly clean squares, refrigerate the cooled pan for about 30 minutes before slicing.
If you’re planning a chocolate dessert table, chocolate chip cookie dough brownie bites give you an easy bite-size companion. These fudge chocolate brownie cookies also bring brownie flavor into cookie form.
How to Tell When Brownies Are Done
This is where I pay the most attention.
A completely clean toothpick can mean you’ve gone too far if your goal is fudgy brownies.
Instead, insert a toothpick near the center. Look for moist crumbs rather than liquid batter.
The edges should look set. Meanwhile, the center should no longer look liquid or jiggle noticeably when you gently move the pan.
The brownies continue setting as they cool.
That’s why I would rather pull them a little early than bake them until the center feels completely firm.
A current cherry brownie recipe gives similar advice: remove brownies when a toothpick comes out with a few crumbs attached rather than baking until dry.
Cherry Substitutions and Expert Brownie Tips
Fresh cherry season doesn’t last forever, and I definitely don’t stop wanting chocolate brownies when summer ends.
Fortunately, frozen cherries can work well.
Fresh, Frozen, or Canned Cherries?
Fresh cherries give you my favorite result. They’re firm enough to survive roasting and usually provide the best flavor during cherry season.
Frozen cherries also work.
Thaw them first. Then drain away excess liquid and pat them gently with paper towels before roasting.
Because frozen fruit releases additional moisture, roasting may take slightly longer.
Canned cherries can work if you choose fruit packed in juice. Drain the cherries thoroughly before roasting and handle them gently because they’re usually softer.
I don’t recommend heavy-syrup cherries for this particular recipe because they can make the brownies unnecessarily sweet.
Cherry pie filling creates a different dessert altogether. It already contains sugar and thickeners, so don’t substitute it cup-for-cup for roasted cherries.
If you want to use pie filling, swirl a small amount through plain brownie batter instead.
For another brownie variation, matcha brownies trade deep cocoa for earthy matcha flavor. Meanwhile, mango cheesecake brownies show another way fruit and rich brownie-style desserts can work together.
My Best Tips for Fudgy Brownies
Don’t overbake. This matters more than almost anything else.
Measure the flour carefully. Too much flour can produce dry, cakey brownies. Spoon it into the measuring cup and level the top rather than packing it down.
Use good chocolate. The chocolate forms a major part of the flavor, so bland chocolate produces bland brownies.
Cool the roasted cherries. Hot fruit can warm the batter unnecessarily.
Fold rather than beat. Once you add flour, use a spatula and stop mixing as soon as the batter comes together.
Don’t add every drop of cherry juice. A small amount of syrupy roasted juice can taste wonderful, but too much adds unnecessary moisture.
Line your pan. Parchment makes removal much easier.
Cool before cutting. Warm Roasted Chocolate Cherry Brownies taste wonderful, but they won’t give you neat squares.
Use a clean knife. Wipe the blade between cuts.
For even sharper edges, chill the cooled brownies briefly and use a large sharp knife.
Serving and Storing Roasted Chocolate Cherry Brownies
These brownies don’t need anything on top. Still, a few simple additions can turn one square into a full dessert.
Vanilla ice cream remains my favorite.
The cold creaminess softens against a slightly warm brownie, while the vanilla lets the cherry and dark chocolate flavors stay front and center.
Serving Ideas and Easy Variations
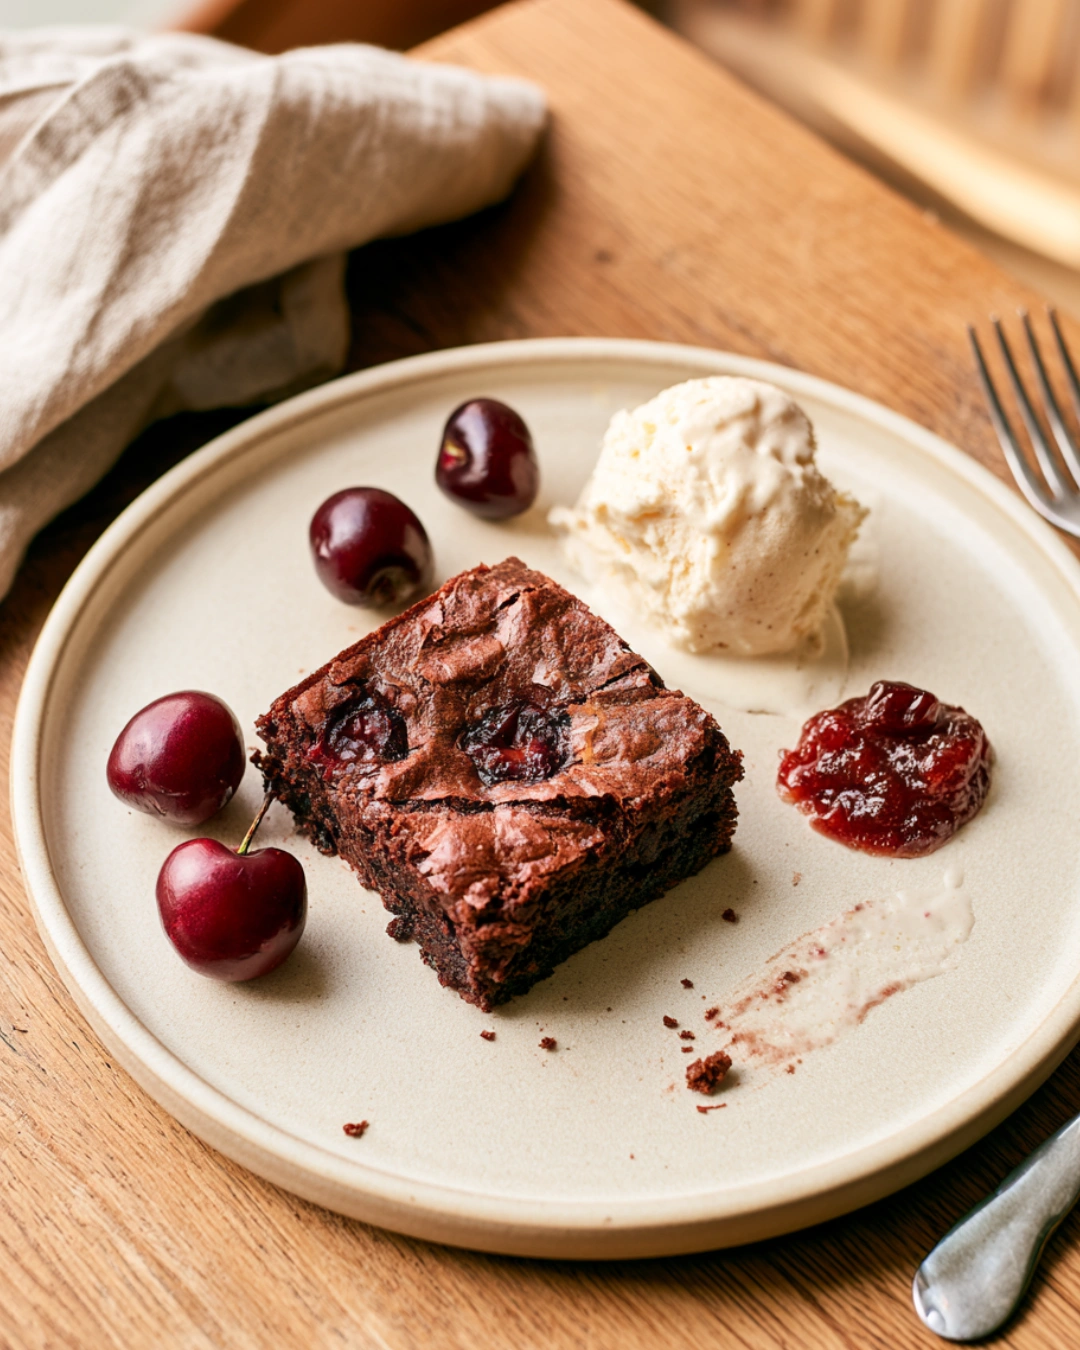
Serve Roasted Chocolate Cherry Brownies with vanilla ice cream and a few fresh cherries when they’re in season.
Alternatively, add lightly sweetened whipped cream for a Black Forest-inspired presentation.
You can also dust the plate with cocoa powder, although I keep it light.
For extra chocolate, fold 1/2 cup chocolate chips or chunks into the batter.
For crunch, add 1/2 cup chopped walnuts, pecans, or almonds.
For a stronger cherry-almond flavor, add a tiny amount of almond extract alongside the vanilla.
You can also add a small amount of espresso powder to deepen the chocolate flavor without turning the brownies into a coffee dessert.
If you’re serving several chocolate desserts, loaded brownie cheesecake cups bring creamy cheesecake into the mix. For a larger dessert that feeds a crowd, chocolate sheet cake makes another reliable choice.
How to Store and Freeze Cherry Brownies
Let the brownies cool completely before storing them.
At room temperature, place the squares in an airtight container and keep them for about 2 to 3 days.
Because they contain fruit, I prefer refrigeration when I need them to last longer.
Store refrigerated brownies in a tightly sealed container for up to 6 days. Then let individual pieces sit at room temperature for 10 to 20 minutes before eating.
You can also freeze them.
First, cool and cut the brownies.
Then wrap each square tightly and place the wrapped brownies inside a freezer-safe container or bag.
Freeze for up to 2 months.
Thaw individual brownies at room temperature, or move several pieces to the refrigerator overnight.
A quick 10-second microwave warm-up can bring back that soft chocolate texture, especially when you’re adding ice cream.
Common Questions
Do I have to roast the cherries, or can I just mix them in?
You can mix them in, but roasting makes the flavor bigger and less watery. It is the difference between a nice brownie and a wow brownie.
What pan size works best?
An 8 by 8 inch pan gives thicker, fudgier brownies. A 9 by 9 inch pan makes them a little thinner and they bake faster, so watch the time.
Can I use milk chocolate instead of dark?
Yes, but the brownies will be sweeter. If you use milk chocolate, consider reducing the sugar a bit and adding a pinch more salt.
How do I know when they are done baking?
The edges should look set and slightly pulled from the pan. The center should not jiggle like liquid. A toothpick should come out with moist crumbs, not raw batter.
Can I add nuts?
Absolutely. Chopped walnuts or almonds are great. Stir them in at the end so they stay crunchy.
Roasted Chocolate Cherry Brownies Worth the Extra Step
Roasted Chocolate Cherry Brownies take something familiar and give it one small twist that makes a noticeable difference.
The cherries turn soft, concentrated, and jammy in the oven. Then those sweet-tart pockets cut through the deep chocolate brownie, so every square tastes rich without feeling one-note.
You don’t need complicated techniques either. The biggest things to remember are simple: don’t dry out the cherries, don’t overmix the batter, and don’t wait for a completely clean toothpick.
Most importantly, give the brownies time to cool.
For comparison and more cherry-chocolate inspiration, Pastry Affair’s Roasted Cherry Dark Chocolate Brownies, Roasted Cherry Brownies from i am baker, and Stephanie’s Sweet Treats’ Roasted Cherry Brownies offer additional approaches to the same rich pairing.
Then all that’s left is deciding whether the first square needs vanilla ice cream or whether eating it straight from the pan counts as quality control.

Roasted Chocolate Cherry Brownies
Ingredients
Method
- Preheat the oven to 375°F (190°C).
- Pit and halve the cherries. Toss them with 1 tablespoon of sugar and spread on a baking sheet.
- Roast cherries for about 15-20 minutes until glossy and slightly collapsed. Let cool.
- In a double boiler, melt butter and dark chocolate together until smooth.
- Remove from heat and whisk in the remaining sugar, eggs, and vanilla extract.
- Fold in flour, cocoa powder, and salt until just combined.
- Gently fold in the roasted cherries.
- Pour the mixture into a greased 8×8 inch baking pan.
- Bake for 25-30 minutes, until the edges are set and a toothpick comes out with moist crumbs.
- Allow the brownies to cool completely in the pan before slicing.
- For best texture, let them chill for 30 minutes before cutting into squares.